The Art of Kokedama
By Rob Sproule
Wabi Sabi
The Basics
What You’ll Need
Assembling It
Basic Care
“There is a crack in everything, that’s how the light gets in.”
– Leonard Cohen
Kokedama is a modern trend with deep and richly philosophical roots. Like many treasured and unique gardening techniques, it’s Japanese and has its own story to tell.
Wabi Sabi:
In Japan, the beauty of transience and imperfection is wabi-sabi. It’s an aesthetic principle that celebrates the irregular, intimate, and modest forms of nature. Traditional kokedama was an expression of Wabi-Sabi practiced on bonsai trees. The trees were taken out of the pots and mounted on driftwood or pottery to express the beauty of rough simplicity.
It’s since evolved to encompass a string-and-moss method of wrapping roots in a natural blanket instead of a pot. The result is a messy living sculpture that still expresses its original wabi-sabi aesthetic.
Learn more forms of Japanese Garden Art, with Alberta’s Best Gardening Blog
The Basics:
The only limit here is your imagination. You can make kokedama out of so many plants that before you know it, the first thing through your head while looking at plants will be, “I wonder how that would look without a pot”¦” Some of the best plants to use are:
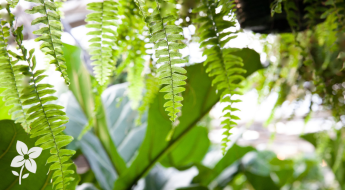
– Ferns
– Orchids (only moss here and no soil)
– Small tropical plants, from Ficus to Pothos. Choose Aralia or Podocarpus if you want a traditional Japanese vibe
– Citrus plants (on the smaller side)
– Just about any tropical vine
– Succulents (but make sure it dries out and don’t pack too hard)
-Air plants (on the outside of the moss)
They aren’t plentiful in Garden Centers yet, so you’ll probably need to DIY. It’s some of the messiest indoor gardening you’ll ever do, so lay out some garbage bags and have fun!
What You’ll need:
Get your ingredients together early so you can let your mind dive in once you’re rolling. Here’s your list:
– Soil (it’s like making a meatball: not too crumbly, not too sticky. Go for 7:3 or 2:1 mix of peat moss to bonsai soil. Add more peat moss or coconut coir if you need it to hold together)
– Sheet moss (or Coco Liner as a substitute)
– Your plant(s)
– Cheese cloth
– Fishing line
– Twine or cotton thread
Assembling It:
– Gently remove as much soil or media as possible from the roots as you can. Make sure to expose the roots, but you don’t need to scrub them clean.
– Blend your soils. Like a meatball, your goal is a small ball that doesn’t fall apart on its own (but not hard as rock either). Usually you want about an orange-sized ball, but it varies by plant.
– Add some water to the ball and make sure it’s big enough to hold your plant’s roots.
– Carefully, make a hole in your ball or split it gently in 2. Fit the roots into it gently, careful not to break any.
– Press the ball back together (don’t squish too hard).
– Wrap cheese-cloth around the ball (optional).
– Wrap sheet moss or coco-liner around the ball. Press parts of it into the soil to anchor. Cover the ball completely and wrap the fishing line around it like a messy little Christmas present.
-Wrap twine around if you want a more decorative wabi-sabi aesthetic (the cotton thread will dissolve).
Basic Care:
Soak your creation entirely in lukewarm water after planting. That’s how to water it, and how often depends on what you’ve planted. For succulents, wait until the surface is quite dry, more often for tropical plants. You can put it in a dish or other vessel if you want, but I prefer hanging. The increased air-flow will make for a healthier plant and it looks amazing.

